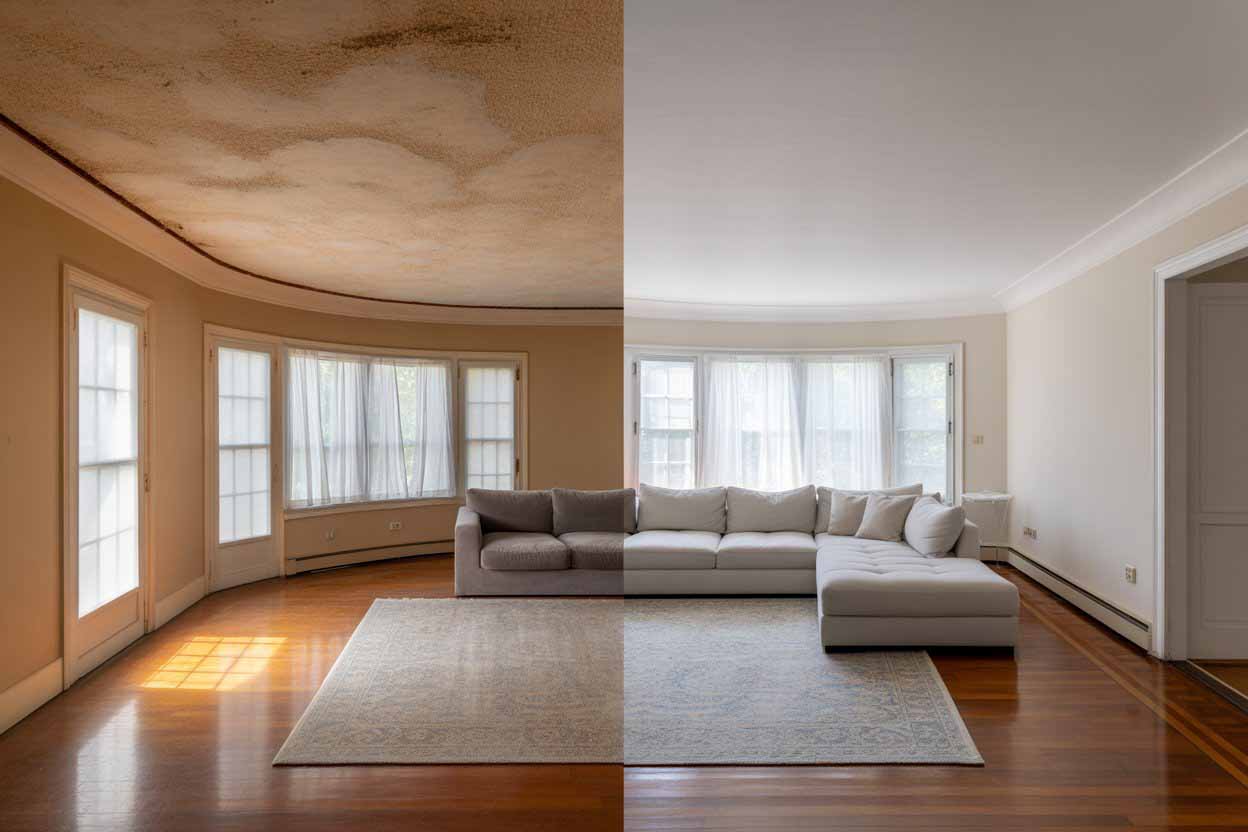
Removing a popcorn ceiling can completely change the look of your home, giving it a cleaner and more modern style. Many American houses still have this old ceiling texture, which collects dust and dulls the room. Learning how to remove popcorn ceiling is one of the most rewarding home renovation projects you can do yourself. With the right tools, like a drywall knife, garden sprayer, and protective gear, the process becomes manageable and cost-effective. Whether you plan a DIY popcorn ceiling removal or hire professionals, this guide will help you understand each step clearly so you can achieve a smooth ceiling finish that instantly brightens your living space.
What Is a Popcorn Ceiling?
A popcorn ceiling, also called an acoustic or stucco ceiling, was used to hide imperfections and absorb sound. Builders liked it because it was cheap, quick, and practical. The bumpy texture came from a spray-on mixture of drywall compound and paint.
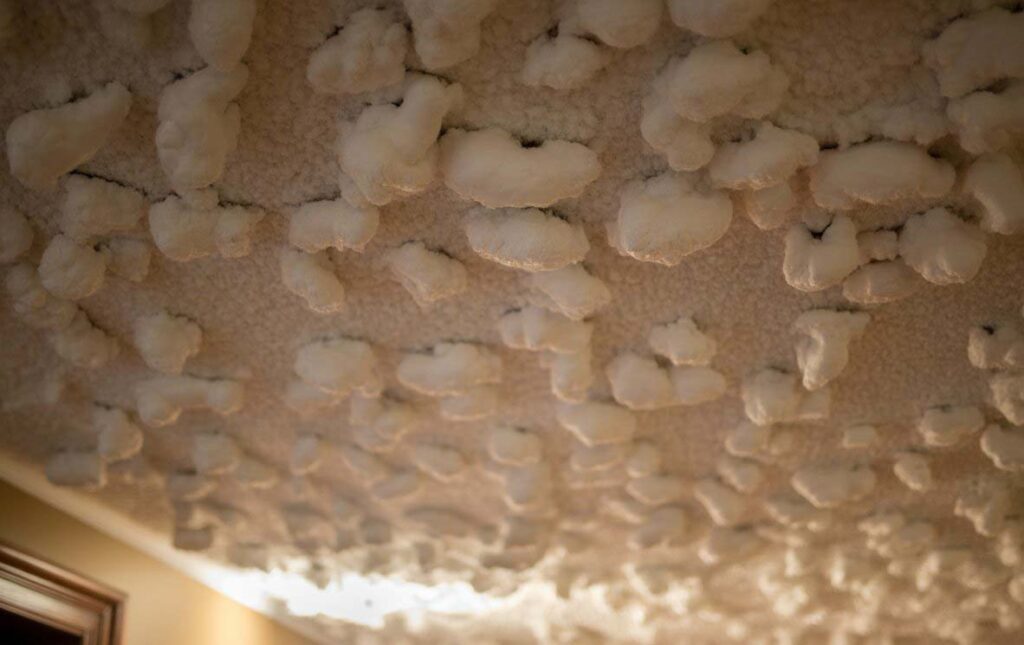
However, the trend faded as homeowners realized this surface trapped dust, darkened spaces, and aged poorly. Many now remove popcorn ceiling as part of a modern ceiling design or larger home renovation project.
Why You Should Remove a Popcorn Ceiling
When you remove popcorn ceiling, you gain a cleaner, brighter, and more elegant space. The smooth ceiling finish reflects light, giving your room a fresh and open look. Removing ceiling texture also helps improve indoor air quality since the rough surface collects dust and cobwebs.
Another reason many homeowners remove popcorn ceiling is safety. Older materials sometimes contain asbestos, a dangerous mineral once used in building products. Modernizing your ceiling makes your home safer and adds to its resale appeal.
Safety Precautions Before You Start

Before starting any DIY popcorn ceiling removal, always perform asbestos testing. If your home was built before 1985, there’s a good chance the ceiling may contain asbestos. You can use a home testing kit or contact a certified lab to test a small sample. If asbestos is detected, don’t scrape it yourself. Call a professional ceiling removal contractor who’s licensed for hazardous material handling.
If your ceiling is safe, gather protective gear. Wear safety goggles, a respirator mask, and a dust mask to prevent inhalation. Use plastic sheeting to cover furniture and floors, and seal off vents and doors to keep dust from spreading. Home preparation for ceiling removal is just as important as the removal itself.
DIY vs. Professional Popcorn Ceiling Removal
Many homeowners ask, “Should I remove my popcorn ceiling myself?” The answer depends on your comfort level and physical ability. DIY ceiling improvement project work can save money but requires patience and strength. The process involves a lot of reaching, scraping, and cleaning.
Professional ceiling removal can be faster and less stressful. The cost varies depending on your area, but professionals handle asbestos safely and deliver a perfect finish. When comparing DIY vs professional removal, consider your time, budget, and the overall look you want to achieve.
Popcorn Ceiling Removal Costs
The cost to remove popcorn ceiling depends on several factors — the ceiling size, its condition, and whether asbestos testing is needed. In most U.S. homes, professional removal costs between $1 and $2 per square foot, while DIY projects are cheaper but take more time.
Below is a simple cost comparison:
| Type | Cost per sq. ft. | Includes |
|---|---|---|
| DIY | $0.30 – $0.50 | Tools and materials only |
| Professional | $1.00 – $2.50 | Labor, cleanup, and supplies |
| Asbestos Removal | $3.00 – $7.00 | Licensed contractor required |
If you hire professionals, request a detailed contractor quote that covers cleanup, ceiling repair, and painting.
How to Prepare Your Space
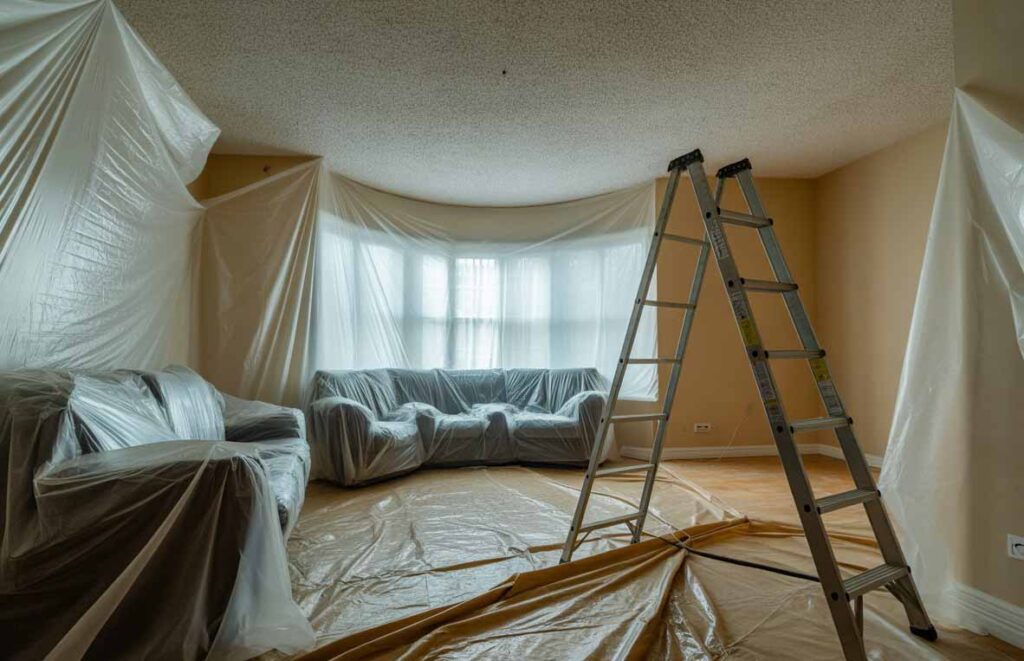
Before you remove popcorn ceiling, empty the room or move large furniture to the center. Cover it with plastic sheeting and secure edges using painter’s tape. Turn off the power to ceiling lights and remove fixtures.
Seal doors, vents, and windows to keep dust from escaping. Adequate preparation not only protects your belongings but also makes the removal process smoother. It’s worth spending an hour prepping properly before you begin to remove popcorn ceiling.
Step-by-Step Methods to Remove Popcorn Ceiling
Method 1: Wet Scraping Technique
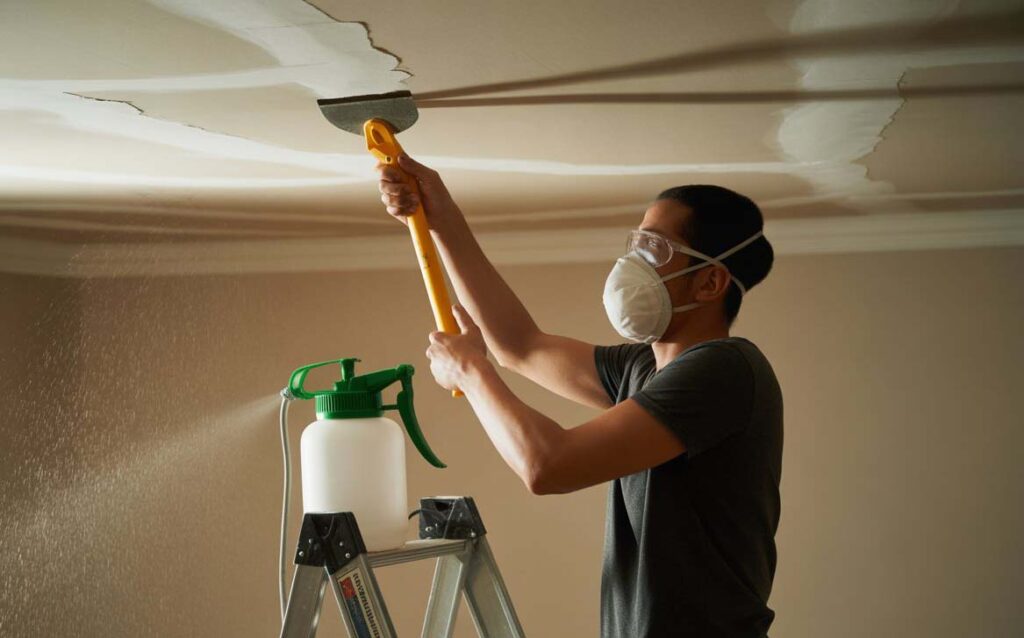
This is the best way to remove popcorn ceiling for most homeowners. Fill a garden sprayer with warm water and lightly mist a small section of the ceiling. Wait ten minutes to let the water soak in, then use a wide drywall knife to scrape off the texture. Keep your scraper flat to avoid gouging the drywall. Wet scraping popcorn ceiling helps soften the material, making it easier to remove without damage.
If the popcorn doesn’t come off easily, it may be painted. In that case, you’ll need to apply more water or switch to another method. Always clean up popcorn ceiling mess as you go, using a shop vac to collect debris.
Method 2: Covering with Drywall or Ceiling Panels
If your ceiling is painted or contains asbestos, it’s safer to cover popcorn ceiling with drywall instead of scraping. Use 1/4-inch drywall sheets and screw them into the ceiling joists. Then tape and mud the seams using joint compound for a smooth surface. Once finished, prime and paint the new ceiling for a clean, modern appearance.
Method 3: Skim Coating for a New Texture
Another way to achieve a smooth ceiling finish is by applying a ceiling skim coating. This involves spreading a thin layer of joint compound over the old texture using a wide trowel. Once dry, sand it smooth with a ceiling sander, then apply primer and paint. This method takes longer but creates a flawless look.
Post-Removal Finishing Touches
After you remove popcorn ceiling, the next step is ceiling repair and patching. Look for dents or scratches, then fill them with joint compound. Once dry, sand gently for a uniform surface.
Apply primer such as BIN 123 Primer to seal the drywall and prepare it for paint. Many homeowners prefer painting ceiling white using shades like Benjamin Moore’s White Dove OC-17 for a bright, clean effect. Always use an extension pole to avoid neck strain.
Common Problems & Solutions
Sometimes when you remove popcorn ceiling, problems arise. If your ceiling was previously painted, the texture may resist scraping. In that case, apply more water or use a sanding popcorn ceiling technique.
If you damage the drywall underneath, sand and repair drywall with joint compound. For deep imperfections, consider ceiling skim coating for a flawless result. A smooth ceiling finish is worth the extra effort because it transforms the look of any room.
Maintenance Tips for Your New Ceiling

Once you remove popcorn ceiling and complete your ceiling makeover, maintain it properly. Gently dust or vacuum the surface every few months to prevent buildup. If you see cracks or moisture stains, fix them quickly to avoid damage.
A freshly painted ceiling usually stays bright for years, but repainting every few seasons keeps it looking new. Removing ceiling texture not only beautifies your home but also makes maintenance easier and your air cleaner.
Final Thoughts
When you remove popcorn ceiling, you’re doing more than improving looks — you’re updating your entire living environment. It’s one of the most satisfying home improvement projects you can complete, whether as a DIY ceiling improvement project or with professional help.
Take time to prepare your space, follow safety precautions, and choose the right removal method. Once you remove popcorn ceiling, your home will feel larger, lighter, and more inviting — a modern upgrade that adds both style and value
FAQs
What is the easiest way to remove popcorn from a ceiling?
The easiest way is to wet the popcorn texture with a garden sprayer and then gently scrape it off using a wide drywall knife at a 45-degree angle.
Is it safe to remove a popcorn ceiling by yourself?
Yes, it’s safe only if the ceiling has no asbestos. Always test for asbestos first and wear protective gear like a respirator mask and goggles.
Is it cheaper to remove popcorn ceiling or replace drywall?
Removing the popcorn ceiling is usually cheaper than replacing drywall, costing about $1–$2 per square foot, while new drywall can cost up to $4–$5 per square foot.
How to tell if a popcorn ceiling has asbestos?
You can’t tell by sight. Send a small ceiling sample to a certified asbestos testing lab or use an at-home asbestos test kit for accurate results.
Is it worth removing an asbestos popcorn ceiling?
Yes, but only through a licensed professional. It’s worth it for your health, safety, and higher home value, but never attempt asbestos removal yourself.